Introduction
The Vista Manager Network Appliance (VST-APL) includes tools to simplify and centralize management and security of your network. There are two possible ways to use the VST-APL:
- As a network management and monitoring device with Vista Manager.
- As a firewall.
This article provides a structured guide for creating container instances in the VST-APL platform. It is intended for use by network engineers and system administrators.
1. Initial Setup
Access to the VST-APL is through the Graphical User Interface (GUI) by connecting your PC to one of the VST-APL ports using an Ethernet cable. Access to the GUI through the Console Port is not possible.
From the factory, the appliance is set to accept an IP address from DHCP. If the device does not receive an IP address from a DHCP server within 10 seconds of the interface becoming active, the VST-APL uses the default IP address 192.168.1.1/24.
If there are problems with the connection, try using http://192.168.1.1. You will see a screen as shown below:

The username would be "manager" and the password would be "friend."
2. Accessing the VST-APL GUI
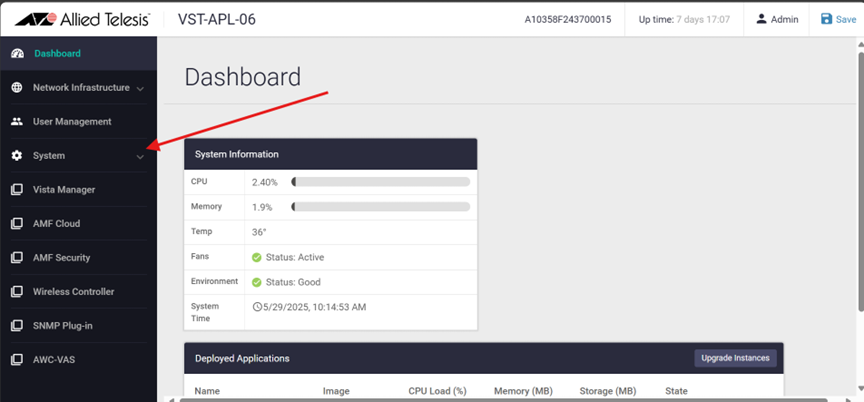
Sign in to the VST-APL interface GUI and click “System” to display the System menu options.
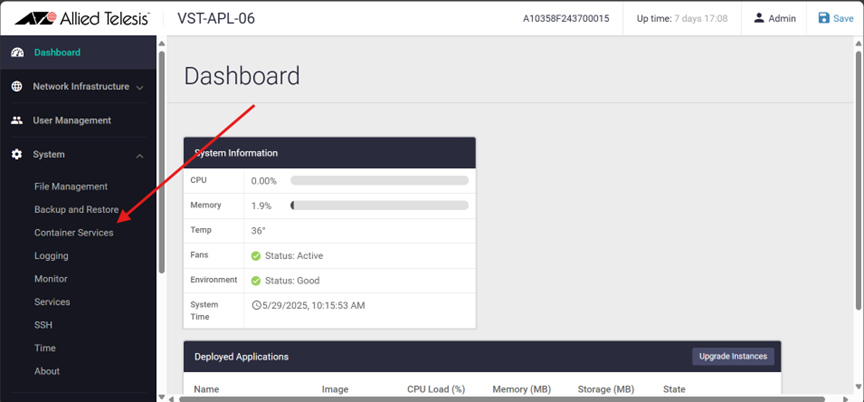
3. Navigating to Container Services
By clicking on "Container Services", you will be redirected to a new screen where you can create the different Applications that can be used in the VST-APL.
4. Creating a New Container Instance
On the Container Services screen, press “Create Instance”, and a form will be displayed where the name of the application (It is recommended to leave the default name) can be chosen, as well as the image to use and other options that will be detailed below.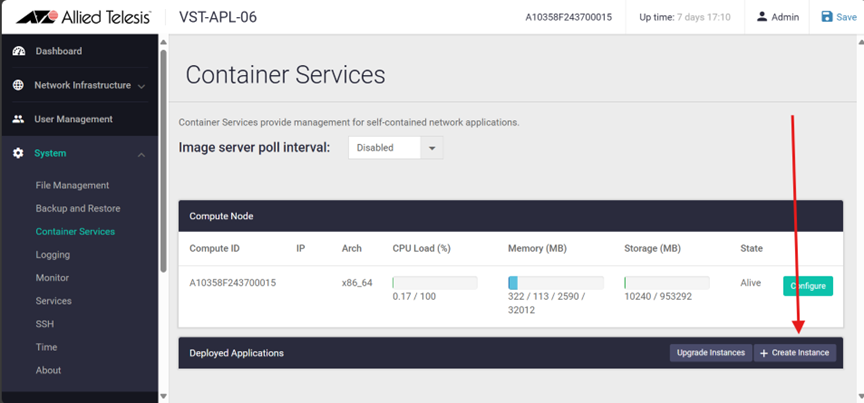
5. Configuring the Container
Create the container that you want to deploy and select the image for the Application (Vista Manager, AMF Cloud, Wireless Controller, etc.) that you want to deploy. Configure the storage and network settings accordingly. If no network settings are configured, it is recommended to use VLAN 1, which is used for internal communication between applications. For more information, please refer to the VST-APL configuration guide.
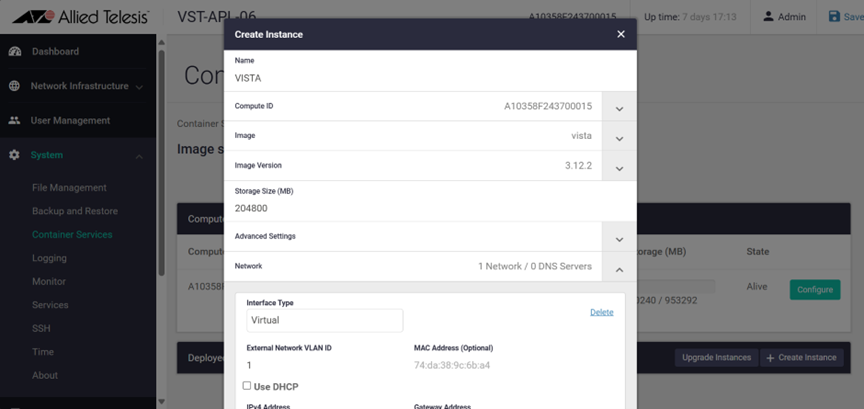
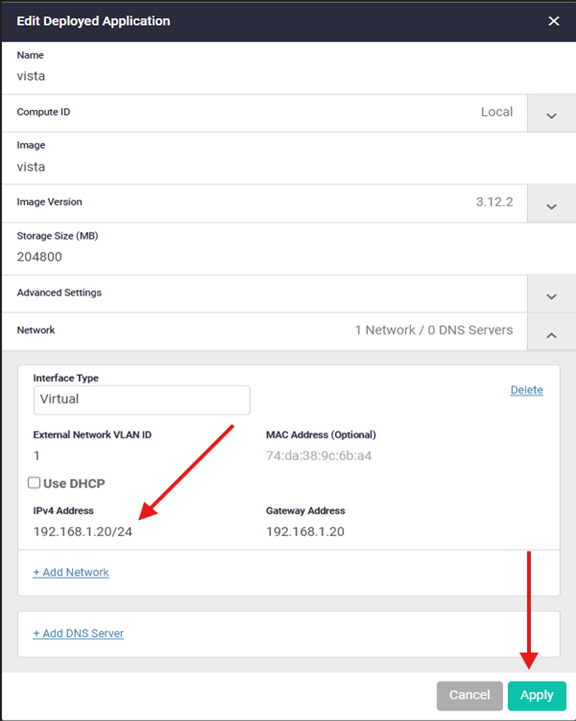
By default, the VST-APL accepts IP addressing from a DHCP server, including an IP address and a default route. You can get these from the DHCP server. If a DHCP server does not supply this configuration to the Application, you will need to manually add an IP address, a subnet mask, and a default route.
Note: The IP address for the Application must be on the same subnet as the VST-APL. Alternatively, you can change the IP address of the VST-APL to be on the required subnet or configure a different VLAN.
Once the configuration steps have been completed, click “Apply”.
6. Deploying the Container
After the extraction of the container finishes, click “Start. You must be a little patient; this takes a couple of minutes, depending on the Application deployed.

7. Accessing the Container Interface
After the extraction is complete, click the “Open” button to navigate to the Application´s interface on the selected IP. A new tab will be opened.
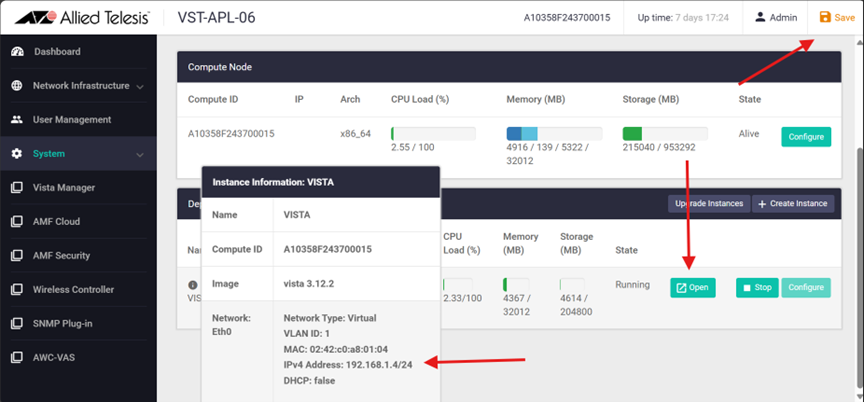
Click “Save” to finalize and save the configuration.
Note: Every time a change is made to any of the Application containers, the "Save" button will turn orange; once the changes have been saved, it will turn blue.
8. Application Storage Information
Below is the recommended storage size for each application.

9. About the Virtual UTM Firewall (NFV-APL)
Running the 10GbE UTM Firewall App (NFV) alongside any other containers is not supported.
For more information, please see the links below:
VST-APL Firewall Installation
Getting Started with the Device GUI on UTM Firewalls